Page 1 of 2 12 LastLast
Results 1 to 30 of 32

Thread: So I bought an Xmag but....

  1. #1
    Join Date
    Sep 2014
    Location
    Okinawa, Japan
    Posts
    28

    So I bought an Xmag but....

    Hey guys i'm in need of some tech advice.

    So I purchased an Xmag but I cannot get it to operate. I was told from the previous owner that it had not been used in at least 5 years, so I went ahead and ordered new o-rings for the Xvalve (they haven't arrived yet). Currently installed o-rings appear to be in "ok" condition... as in they aren't dry rotting. Upon inspection of the marker, it was not cleaned from the last time it was used. I cleaned out the barrel and oiled her up the best I could. I did not remove the rail from the body. I have a slight air leak at both ends of the macroline, but nothing from the valve itself... at least as far as I can tell. The bolt itself had a clear rubbery substance on the back of it but it was coming off (I replaced it with the blue foamie). For the life of me, I could not get it to shoot in any of modes (the board and batt are good). Somehow, I did manage to get it to shoot 4-5 rounds but then it went "dead" again (this is in mech mode). I understand that this might just be valve o-ring issues but I want to be progressive on this as it would take some time mailing it off to AGD or Tuna to fix from Japan. Oh... and on those 4-5 rounds that actually worked the bolt shot the rubber triangle thing off from the bolt I have another in my tool kit but what is the best method to use as far as adhesive goes? You can see that when gassed up the sear pin doesn't seem to protrude to the trigger (i'm not sure if thats normal on the Xmag, but it's not normal for my automag). I also placed the marker in ACE 0 and tried all ACE modes in attempts to get it to work.
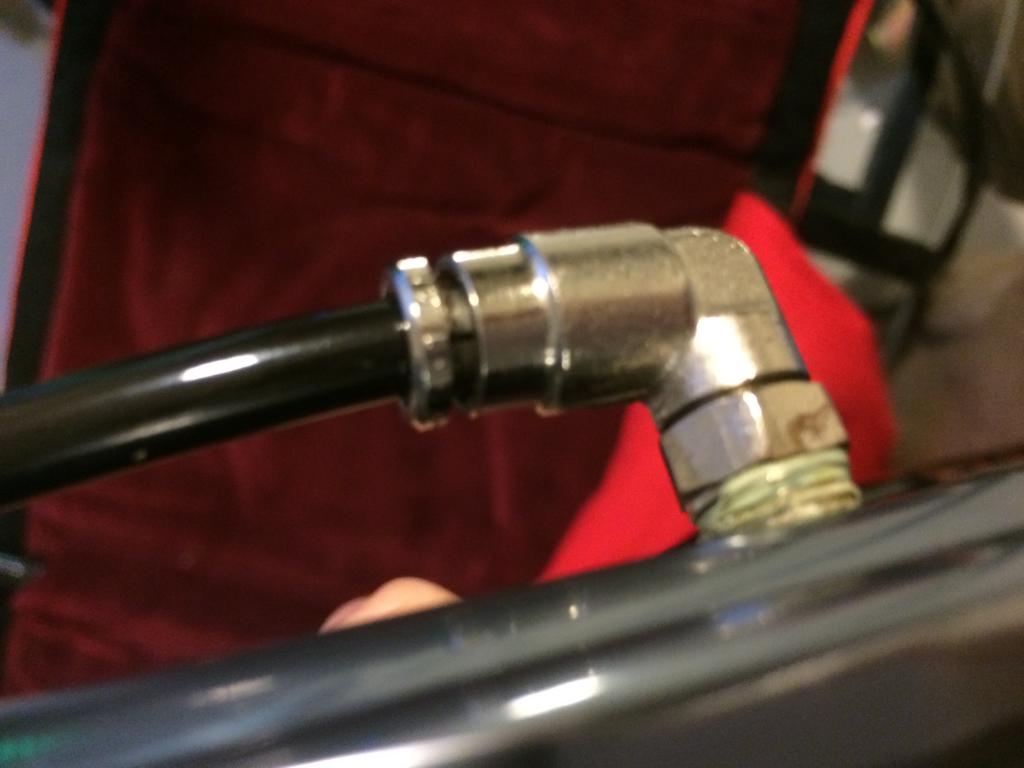
    Attached are the problem areas that i have identified thus far. The pic of the software version is to show that the board works.
    Thanks in advance for the advice!

    Name:  IMG_0209.jpg
Views: 71
Size:  66.6 KBName:  IMG_0211.jpg
Views: 69
Size:  76.3 KBName:  IMG_0212.jpg
Views: 57
Size:  108.9 KBName:  IMG_0213.jpg
Views: 67
Size:  53.2 KB
    Attached Images Attached Images  

  2. #2
    Join Date
    Sep 2014
    Location
    Okinawa, Japan
    Posts
    28
    ****UPDATE****

    After attempting to fix the leak in the macroline... there appeared to be just a few fragments of an oring on the tank-side of the macroline but they were so small I question if there really was an oring in there at all. The other oring was intact but I need to replace it as well. I can blow air through the macroline so I don't believe there are oring fragments in the line and I have seen no fragments within the valve. Where would the fragments settle within the marker or would they be blown out?

    Also, where is a good source to order macroline o-rings? The fittings on this marker are two different sizes so i'm not sure if both sides get an oring and if they do, are they the same size?

    Name:  IMG_0217 (2).jpg
Views: 63
Size:  61.7 KB
    Last edited by Motrin870; 10-25-2014 at 04:53 AM. Reason: added photo

  3. #3
    Join Date
    Oct 2001
    Location
    Inception Designs HQ
    Posts
    3,079
    Contact Tuna or BigEvil about your mag. Do not worry about the time it takes, as you would rather make sure its 100% working than to cheap out on a few days in time. You can send the fittings with the gun, but i suspect it would be easier to just replace them. As for the gun not shooting, even though the LED is lighting up, the noid might not be getting enough juice. Again, send it to BigEvil and he will go through the entire gun. If you have followed any one on here, BigEvil is who Bunny sends his guns to, when they aren't working.

    So contqct him, make aure you ship the gun insured and through FedEx or other reputable shipping firm and set aside some cash for repairs.

  4. #4
    Join Date
    Sep 2014
    Location
    Okinawa, Japan
    Posts
    28
    I might have to do just that... however if I can fix the issue myself with the help and knowledge of people on this forum then I would like to try that first. To get timely shipping to and from Japan I would have to ship priority (still takes two weeks usually, one way), and shipping alone to and from would probably be over $60. At the end of that I would learn nothing. I'm new to Xvalves and electric markers and I want to learn instead of just shipping it off without at least trying to fix it myself. Thank you for your help on the other thread about the lvl 10 bolt. I was able to fix the leaking problem on my minimag with a different carrier. I'm still trying to figure out the spring logic though.

  5. #5
    Join Date
    Nov 2012
    Location
    Finland
    Posts
    940
    I live in the Finland so I can understand that you'd rather learn to tech the gun yourself. I'm not personally familiar with teching e-/x-mags, but I think in mech mode the sear rod should have the regular gap (about credit card thickness) between the tip and back of the trigger. Someone do correct me if I'm spouting utter nonsense.

  6. #6
    Join Date
    Aug 2008
    Location
    Chicago, IL
    Posts
    327
    If you have a digital micrometer you should check the lengths of both the trigger pin as well as the plunger, it also might be a good idea to check the on/off just in case it was swapped out before it was putt away with the incorrect pin.

    Trigger Rod: 2.125"

    Solenoid Plunger Rod: 3.005"

    On/Off pin: .712" w/ brass top and double o-ring top.
    .725" w/ aluminum top and single o-ring top.

    Do you know if that is a modified stock trigger or if its custom? I know I had some issues getting my xmag to fire properly because my fireblade trigger is not made to agd specs.

  7. #7
    Cyco-Dude Guest
    Quote Originally Posted by Motrin870 View Post
    After attempting to fix the leak in the macroline... there appeared to be just a few fragments of an oring on the tank-side of the macroline but they were so small I question if there really was an oring in there at all. The other oring was intact but I need to replace it as well. I can blow air through the macroline so I don't believe there are oring fragments in the line and I have seen no fragments within the valve. Where would the fragments settle within the marker or would they be blown out?

    Also, where is a good source to order macroline o-rings?
    macroline fittings use standard o-rings, size 010 (3/8" OD, 1/4" ID). any fragments would go into the valve. just clean it out good when you go to replace the valve o-rings (also, don't forget to replace the o-rings on the valve pin assembly).

    also, it would be a good idea to read the x-mag user manual if you haven't already.

    regarding the foamie, clean the bolt tip off well...you want to make sure there is no loose debris, dirt or oil where the new foamie will go. then just use super glue to glue a new one in there.

  8. #8
    Join Date
    Jan 2002
    Location
    Halifax, N.S., Canada
    Posts
    8,039
    The first thing you want to do is make sure the orings in the valve are all good. If you have inspected the valve and they look fine, that is a good and you should be able to at least get it going until your new orings get here. The on-off pin should be 0.712" since it is an X-valve, and it should have the black quad oring inside a whitish urethane oring at the on-off top.

    The first order of business is to get the gun working in mechanical mode. Do adjust your solenoid plunger first, though. It will affect all of your settings, and the length of the plunger is a critcal value that will affect electronic performance.

    Steps (assuming you have good orings in your valve):
    - Adjust the plunger and trigger rod assembly to the proper lengths.
    - Remove valve and install short gold bolt spring.
    - Remove all powertube shims
    - Remove carrier from powertube and install the proper carrier size as per the level 10 tuning guide.
    - Make sure the bumper is installed and intact (If the bumper is shredded, put a new one on).
    - Install valve
    - put selector switch towards mechanical mode setting
    - hold trigger and air up gun.
    - Release trigger.
    - Did the sear click into place? If yes then proceed to the next step below. If not, the trigger rod will be limp and won't come forward, so you will need to adjust the level 10 bolt system.
    - Listen for leaks.
    - If no leaks are present, fire gun.
    - If gun doesn't fire, increase velocity and continue to release and pull trigger until gun fires.
    - If gun never fires you probably have level 10 bolt stick or are using a bottle with a regulator that has too low a pressure output.

    Once you get the mechanical gun working, we can proceed to getting the electronic part working.
    Except for the Automag in front, its usually the man behind the equipment that counts.

  9. #9
    Join Date
    Sep 2014
    Location
    Okinawa, Japan
    Posts
    28
    I went to the big American store today (Kadena Air Force Base) and they did not sell any o-ring kits or a digital micrometer. I'll have to order those items or hope a fellow paintballer has them at the field here��

  10. #10
    Join Date
    Sep 2014
    Location
    Okinawa, Japan
    Posts
    28
    Macro line leak fixed and all o-rings replaced except the tiny one in the brass on/off and the one in the Lv 10 carrier. I didn't mess with the oring stack that AGD says not to mess with save for oiling everything nicely. Sometimes I can get one shot off in mech mode but then I hear gas getting louder in the valve over 5 sec trying to recharge, then I hear it click and try to fire again and get a little putter. When this happens, I see the bolt move just a hair. I hear nothing when switching over to E-mode. There is one wire not attached on the board not sure what it belongs to. Also, I have difficulty in removing the valve from the body as it is catching on something (yes it's in mech mode but I've tried everything).

    Open to suggestions on how to fix but at this point I might just need to ship it off for repair and tuning. I don't have a digital micrometer here so I can't take measurements.

  11. #11
    Join Date
    Sep 2014
    Location
    Okinawa, Japan
    Posts
    28
    Macro line leak fixed and all o-rings replaced except the tiny one in the brass on/off and the one in the Lv 10 carrier. I didn't mess with the oring stack that AGD says not to mess with save for oiling everything nicely. Sometimes I can get one shot off in mech mode but then I hear gas getting louder in the valve over 5 sec trying to recharge, then I hear it click and try to fire again and get a little putter. When this happens, I see the bolt move just a hair. Turned reg up all the way and it didn't make a difference. I hear nothing when switching over to E-mode. There is one wire not attached on the board not sure what it belongs to. Also, I have difficulty in removing the valve from the body as it is catching on something (yes it's in mech mode but I've tried everything).

    Open to suggestions on how to fix but at this point I might just need to ship it off for repair and tuning. I don't have a digital micrometer here so I can't take measurements, but I'm about to order one.Name:  image.jpg
Views: 60
Size:  87.1 KB
    Last edited by Motrin870; 11-02-2014 at 07:17 AM. Reason: Added photo loose wire

  12. #12
    Join Date
    Jan 2002
    Location
    Halifax, N.S., Canada
    Posts
    8,039
    The hiss and click you are hearing is probably caused by bolt stick and the level 10 is letting air out and resetting. That would mean your level 10 bolt setup needs to be tuned. The bolt only moving a tiny bit is usually related to bolt stick as well.

  13. #13
    Cyco-Dude Guest
    ok, it sounds to me like you have bolt stick. this can be due to a number of reasons:

    • lvl 10 carrier too small, causing excess friction. try a larger carrier...you want the largest carrier that doesn't leak.
    • carrier o-ring just needs to be broken in if it's new (basically in-between carrier sizes...next larger size leaks. run a case of paint through the valve and see how it does)
    • mechanical jamming. either the frame, or field strip screw is too tight, and the valve is not correctly aligned with the body. when it sticks, try loosening the field strip screw with an allen wrench and see if it helps. usually the bolt would reset right away if this was the cause.

    as for difficulty in removing the valve, that is because the on/off pin is protruding down, and catching on the body. you need to pull the trigger all the way to push it up far enough so it will clear the body. it might help to stick a small allen wrench in-between the trigger and sear rod to get the pin up all the way.

  14. #14
    Join Date
    Sep 2014
    Location
    Okinawa, Japan
    Posts
    28
    I'll look into the carrier size and replace the old carrier oring tomorrow and see if that does the trick. It came with 3 shims so I will remove those as well and start from scratch. I need to replace that tiny oring in the on/off but I can't get it unscrewed... Any tips for that?

    I tried the Allen wrench thing yesterday; pushing in the sear pin with it but no joy. I also tried moving it out (no safety switch in the grips) and that didn't work either. Digital micrometer has been ordered. I'll push updates out tomorrow after work. Thanks guys maybe I can get this thing going with your help!

  15. #15
    Cyco-Dude Guest
    Quote Originally Posted by Motrin870 View Post
    I'll look into the carrier size and replace the old carrier oring tomorrow and see if that does the trick. It came with 3 shims so I will remove those as well and start from scratch. I need to replace that tiny oring in the on/off but I can't get it unscrewed... Any tips for that?
    well, if the o-ring isn't bad leave it. you use the same carrier o-ring when tuning the level 10 bolt. as for unscrewing a tight on/off, use a pair of wrenches.

  16. #16
    Join Date
    Jan 2002
    Location
    Halifax, N.S., Canada
    Posts
    8,039
    Quote Originally Posted by Motrin870 View Post
    I'll look into the carrier size and replace the old carrier oring tomorrow and see if that does the trick. It came with 3 shims so I will remove those as well and start from scratch.
    As mentioned, you shouldn't replace the carrier oring. Its the oring tension that you are adjusting with the carrier sizes.

    You don't want any shims installed in your powertube. They can cause leaks that make you install a carrier size that is too tight for your setup.

  17. #17
    Join Date
    Sep 2014
    Location
    Okinawa, Japan
    Posts
    28
    Update

    I removed all 3 shims in the power tube. I managed to unscrew the on/off using pliers and replace and lube the small oring within. When trying to remove the valve from the body, I did manage to see the on/off pin was what was catching even though pulling the trigger or using a tool to depress the sear pin didn't work (I had to remove the sear pin and trigger frame screw to disassemble it and after removing the on/off assembly the pin was still stuck inside). I did not mess with the carrier or carrier oring. Also, the odd looking black rubber piece that fits inside the on/off tube oring was not replaced as it did not come in the xvalve repair kit.

    I live in on base housing and its late, so I didn't get a chance to gas up and test. I'll have to try that tomorrow
    Thanks for the help thus far hopefully m- mode will work and then I can move on to getting e-mode to work.

  18. #18
    Join Date
    Nov 2012
    Location
    Finland
    Posts
    940
    Quote Originally Posted by Motrin870 View Post
    Update
    Also, the odd looking black rubber piece that fits inside the on/off tube oring was not replaced as it did not come in the xvalve repair kit.
    You are probably talking about quad o-ring?

  19. #19
    Join Date
    Sep 2014
    Location
    Okinawa, Japan
    Posts
    28
    Yup that's the one! I'm wondering if that is part of the prob as the on/off pin was stuck in it after pulling out the on/off assembly.

    Guess I'll have to wait till tomorrow to find out.

  20. #20
    Cyco-Dude Guest
    Quote Originally Posted by Motrin870 View Post
    Yup that's the one! I'm wondering if that is part of the prob as the on/off pin was stuck in it after pulling out the on/off assembly.

    Guess I'll have to wait till tomorrow to find out.
    on/off pins do that...stick in the o-ring that is. fairly common, in my experience.

  21. #21
    Join Date
    Sep 2014
    Location
    Okinawa, Japan
    Posts
    28
    Marker still does not work. I'm regretting my purchase at this point and I'm not talking about "buyers remorse". This thing was supposed to be fully operational and clearly it is not. Had a former xmag owner at the local field look at it as well and we can't figure it out.

  22. #22
    Cyco-Dude Guest
    Quote Originally Posted by Motrin870 View Post
    Marker still does not work.
    in which mode? what's it doing, exactly? have you checked the sear trigger rod and solenoid plunger to make sure they are in-spec and not bent?

  23. #23
    Join Date
    Sep 2014
    Location
    Okinawa, Japan
    Posts
    28
    The plunger moves easily but I can't check measurements until the tool arrives from Amazon. After making the adjustments stated above, gasing it up I hear the air going into the valve and a click. In all modes the marker does nothing, not a click or a chuff or anything. I didn't even bother attempting to remove the valve afterward but I have a feeling that the on/off pin is again obstructing it and I'll have to disassemble the marker again to remove it. The sear and sear pin should operate, at least in my mind, crisp like my minimag but it feels stiff and unresponsive. The sear assembly moves freely when I opened up the grips to check on the plunger, at least while not connected to the body.

    The guy I purchased it from claimed it was fully operational so I figured it was just an oring issue but I'm not so sure anymore. In e-mode I hear nothing as well so there might be more than one issue here.

  24. #24
    I once had a sear that was bent just slightly, but caused the symptoms you describe in a mech mag. Without a body on it, the sear appeared to move freely. When set up with a body and valve, it would stick.

  25. #25
    Cyco-Dude Guest
    so..how stiff is the trigger when it's gassed up? can you pull it at all? or is it kind of spongy when you pull it, and the marker doesn't fire? if that's the case...have you tried increasing the velocity?

  26. #26
    Join Date
    Aug 2006
    Location
    West By God Virginia
    Posts
    3,405
    After pulling the on off out , the pin should come out with your fingers , quad rings can get gummy and grip the pin too tight , remove the quad ring and check it ( & you should not have to use tools to take an on/off apart ) , after removing the valve , with the body still mounted to the grip frame the sear assembly should pivot freely just by moving /changing the angle of the body & frame

  27. #27
    Join Date
    Sep 2014
    Location
    Okinawa, Japan
    Posts
    28
    Xvalve stuck in frame again first thing when picking it up again today. Marker still does not work.

    The sear mechanism moves easily when trigger frame and body are connected but without the valve.

    Re-oiled the on/off orings and the on/off pin moves well within the on/off assembly, at least when it is not within the xvalve.

    The lv 10 bolt is not stuck on the powertube and moves well. It might actually move a little easier than the lv 10 bolt on my automag.

    When gasing up the marker, there is now a very small leak around the bolt area, however this time around the bolt moved forward slightly when air was introduced to the valve. When pressing in the trigger and holding, the leak stopped for about three seconds then came back. After this experience, the sear pin became unresponsive and stuck within the trigger frame as if I was still holding the trigger down. Now that I think about it, the sear pin didn't move at all when I first gased it up; it just happened to be sticking out of the frame about a credit card length or maybe just a hair more than that.

    I increased the velocity mechanism and it did not change the air leak, the sear mechanism, or get the marker to work.

    The problem, as it seems to me, is getting the air in the valve to translate over to the sear mechanism. Because i'm having issues with the on/off pin every time I disassemble the marker, i'm leaning toward an issue in the on/off mechanism. I will attempt to change the oring that surrounds the quad oring and see if that changes anything. Perhaps the oring is just a little to tight and causing the quad oring to "hold onto" the on/off pin?" Not really sure i'm just throwing out ideas that are in my head.

    Also, seeing that the marker worked before the previous owner put it on the shelf for 5-6 years, I believe the issue has to be oring related as opposed to a mechanical (check the length of XXX) type of thing. I of course could be wrong as i'm no pro at these things, but why would it work when he put it away and not now if it was a mechanical issue?

    *****Actually maybe i'm completely wrong... perhaps it's not firing because the sear is not hitting the on/off pin and that is also why I'm not able to remove the xvalve from the frame without taking the marker apart. If that's the case, how would I test this? I've got a digital micrometer on it's way to me so I can't check the lengths right now, but is there another way to test the functionality of the sear portion that makes contact with the on/off pin?
    Last edited by Motrin870; 11-05-2014 at 05:48 AM.

  28. #28
    Join Date
    Sep 2014
    Location
    Okinawa, Japan
    Posts
    28
    Ok so when manually depressing the back of the sear (that meets the on/off pin), it has to be pressed down all the way to get that credit card length sear pin to protrude through the frame. When pressing the trigger and keeping pressure on the sear portion, the sear does not come all the way up flush with the frame.

    Sometimes when I press on the sear (where on/off meets) with a small tool then release, it stays down and does not return to it's neutral position.

    When the sear is flush with the frame as if I just removed the valve, the sear pin does not protrude through the frame. Not sure if this is normal on xmags but perhaps it's an indicator of an issue to one of you tech pros.


    ** Edited. Xvalve works in automag frame.
    Last edited by Motrin870; 11-05-2014 at 06:01 AM.

  29. #29
    Join Date
    Nov 2012
    Location
    Finland
    Posts
    940
    So that would imply that the problem is not in the valve. It could be improperly adjusted sear. Maybe bent solenoid plunger? Do xmags use rail bushings?

  30. #30
    Join Date
    Sep 2014
    Location
    Okinawa, Japan
    Posts
    28
    Mailing it off to BigEvil to take a look at. At this point it's above my level to tech. The individual who sold me the marker is assisting with cost... Great dude most people don't live by that kind of code!

    Big thanks to all who replied trying to help! I'd buy you all a drink if you lived nearby!

Posting Permissions

  • You may not post new threads
  • You may not post replies
  • You may not post attachments
  • You may not edit your posts
  •