Page 15 of 18 FirstFirst ... 51112131415161718 LastLast
Results 421 to 450 of 523

Thread: Introducing The Deflator

  1. #421
    Join Date
    Jan 2001
    Location
    Cottonwood, Az.
    Posts
    8,184
    OK, we're back on track!
    I lost two weeks on the feedcup prototyping due to waiting on replacement tooling on two tool orders. The new feedcup design panned out so everyone that ordered bodies will be getting a free feedtube assembly.
    The new design works with large and small hopper necks.
    I will be starting production on the feedcups and brass barrel nuts tomorrow. As soon as the runs are done I'll start the Deflator machining.
    We are getting close to wrapping this up.


    By the way, production bodies will not have that extra line above the side milling.

  2. #422
    Join Date
    Dec 2014
    Location
    Texas
    Posts
    34
    Looking awesome! I'm eagerly awaiting mine.

    Question: will a CCM air fitting fit on the valve, or is the body too thick?

  3. #423
    Join Date
    Jan 2001
    Location
    Cottonwood, Az.
    Posts
    8,184
    Quote Originally Posted by cortexparasite View Post
    Question: will a CCM air fitting fit on the valve, or is the body too thick?
    No idea, but if you send me one I can check and make adjustments if necessary.

  4. #424
    Join Date
    Jul 2002
    Location
    Western Mass
    Posts
    582
    Just going off looks I think a CCM fitting might be a tight squeeze if you tried to have it go straight towards the front. I'd imagine they would fit if you angled it up slightly. If I had to guess I'd say that the rear most milled line will be in the way of the CCM fitting.

    Luke if I measure how far a CCM fitting sits away from an ASA or even a ULE body would that help? That way you wouldn't have to wait on somebody sending you one. They sit pretty close to a ULE body if I remember correctly.

    I'm not planning on using them on mine but I have them if I wanted.
    The user formally known as Lancecst.

  5. #425
    Join Date
    Jul 2002
    Location
    Western Mass
    Posts
    582
    I like the feedneck design. I think it fits th flow of the body nicely.

  6. #426
    Quote Originally Posted by BLachance75 View Post
    I like the feedneck design. I think it fits th flow of the body nicely.
    +1 The feedneck turned out really well.

  7. #427
    Join Date
    Jan 2001
    Location
    Cottonwood, Az.
    Posts
    8,184
    Quote Originally Posted by BLachance75 View Post
    Luke if I measure how far a CCM fitting sits away from an ASA or even a ULE body would that help?
    Sure, that would be a good start.

  8. #428
    Join Date
    Jul 2002
    Location
    Western Mass
    Posts
    582
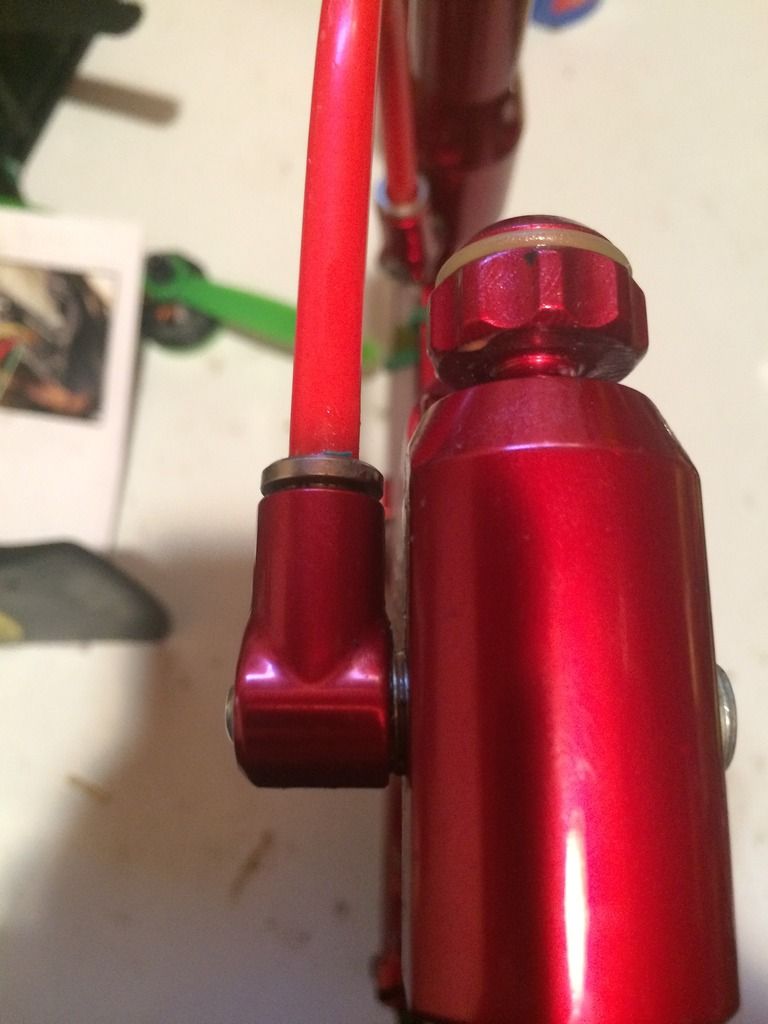
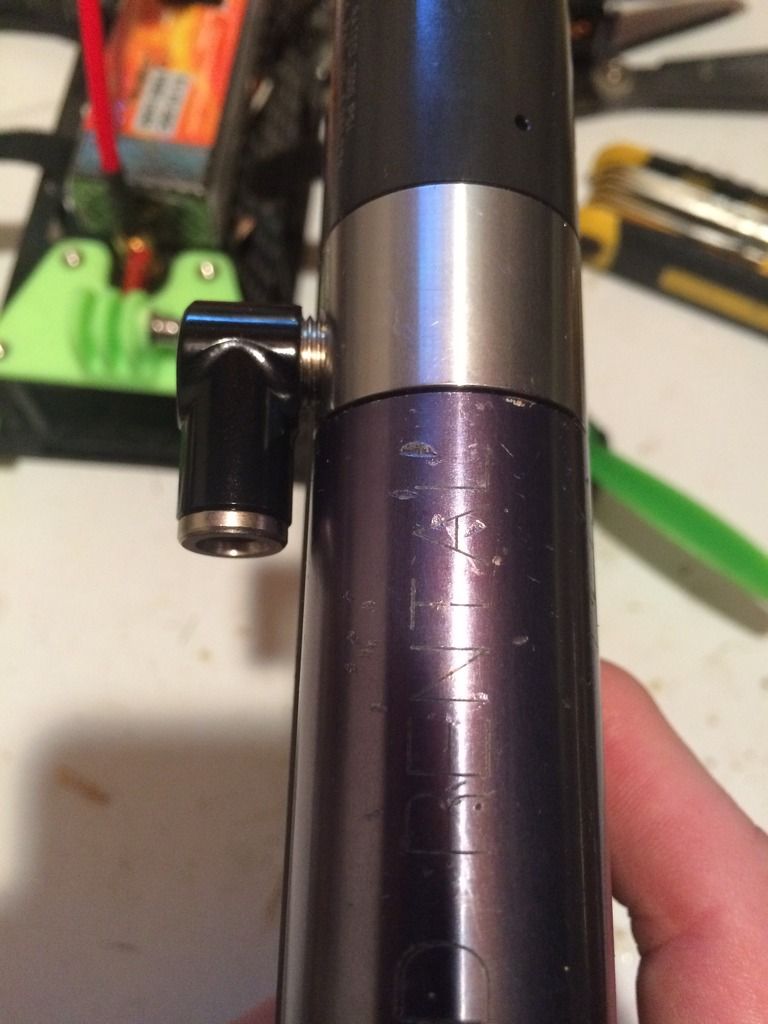
    Here you go, if you want other pictures or measurements let me know.

    This fitting sits .062 away from the ASA


    This one is .07 away from the ULE body


    From the front edge of the threading to the end of the fitting is .65

  9. #429
    Join Date
    Jan 2001
    Location
    Cottonwood, Az.
    Posts
    8,184

  10. #430
    Join Date
    Jul 2002
    Location
    Western Mass
    Posts
    582
    There is .070" between the body and the edge of the fitting.

  11. #431
    Join Date
    Jan 2001
    Location
    Cottonwood, Az.
    Posts
    8,184
    It's way too tight to be certain but I have fittings in route to verify.

  12. #432
    Join Date
    Oct 2006
    Location
    central coast cali 805
    Posts
    1,173
    If you can find older ccm fittings they have a longer 'post'...I use the older ones on tac bodies for the clearance

  13. #433
    Join Date
    Jan 2001
    Location
    Cottonwood, Az.
    Posts
    8,184
    Quote Originally Posted by keiko_819 View Post
    If you can find older ccm fittings they have a longer 'post'...I use the older ones on tac bodies for the clearance
    Good to know, thanks.

  14. #434
    Join Date
    Dec 2014
    Location
    Texas
    Posts
    34
    Thanks to everyone jumping in on the CCM fittings! I don't have any on hand, but was planning on using them with this build. Hopefully they'll work out!

  15. #435
    Just a FYI about the fittings. I called CCM and talked to one of the techs. He mentioned that there current run of fittings is an even lower profile that the ones of previous years. This would also be different from the often sought after old style that had long stems. I was calling CCM back since they had a few of the long stems they found for me a year ago. So in short be careful with the new ones purchased, I get a feel that they will cause problems running them with a lot of after market bodies since the stems are even shorter that just months ago.

  16. #436
    Join Date
    Jul 2002
    Location
    Western Mass
    Posts
    582
    The black ones in my picture were purchased last year, and the red ones are at least 4 years old if I had to guess. I'm not sure when they changed over but it must have been a while ago.

  17. #437
    This conversation was last week. I called in to follow up on there quest to find the real long posts initially made. They looked for about a year as they were going through old inventory. I had this discussion with the tech when he told me of the change. I bought the last three long post from them after there long search. This lead into inquiring about if they're going to make the longer ones, when I was told actually the new run is short in the stem and making them lower profile than before.

  18. #438
    Join Date
    Jan 2001
    Location
    Cottonwood, Az.
    Posts
    8,184
    Finished up the feedcups and brass barrel nuts.


    Will be starting of the Deflator parts tomorrow.

  19. #439
    Join Date
    Dec 2004
    Location
    Jeet yet ?
    Posts
    8,139
    If you like black, or black, the Azodin macro fittings are great.

    http://store.azodin.com/index.php?ro...arch=macroline


    I dont have the tool to measure the distance but you can see theres plenty of clearance from the Tac body.


  20. #440
    Join Date
    Jan 2001
    Location
    Cottonwood, Az.
    Posts
    8,184
    Grip frames, LPR-FG's and bodies are done.
    Tomorrow I'll start on the grip panels then this project will be wrapped up.
    Besides a body for myself no extras were made.


  21. #441
    Join Date
    Jan 2002
    Location
    Va
    Posts
    331
    1/7 means that they will double in value as soon as they leave your door. Nice.

  22. #442
    Join Date
    Jan 2001
    Location
    Cottonwood, Az.
    Posts
    8,184
    This might help as well.


    Etc...

    I marked the prototype "P1" so there was a total of 9 usable bodies done.

  23. #443
    Join Date
    Jul 2002
    Location
    Western Mass
    Posts
    582
    I like the individual numbering, nice extra touch.

    I think that you guys will be surprised with what it weighs. I got the prototype body in the mail today and I couldn't believe how light it is. I should be able to put it together after work tonight and snap a picture.

  24. #444
    Join Date
    Jul 2002
    Location
    Western Mass
    Posts
    582
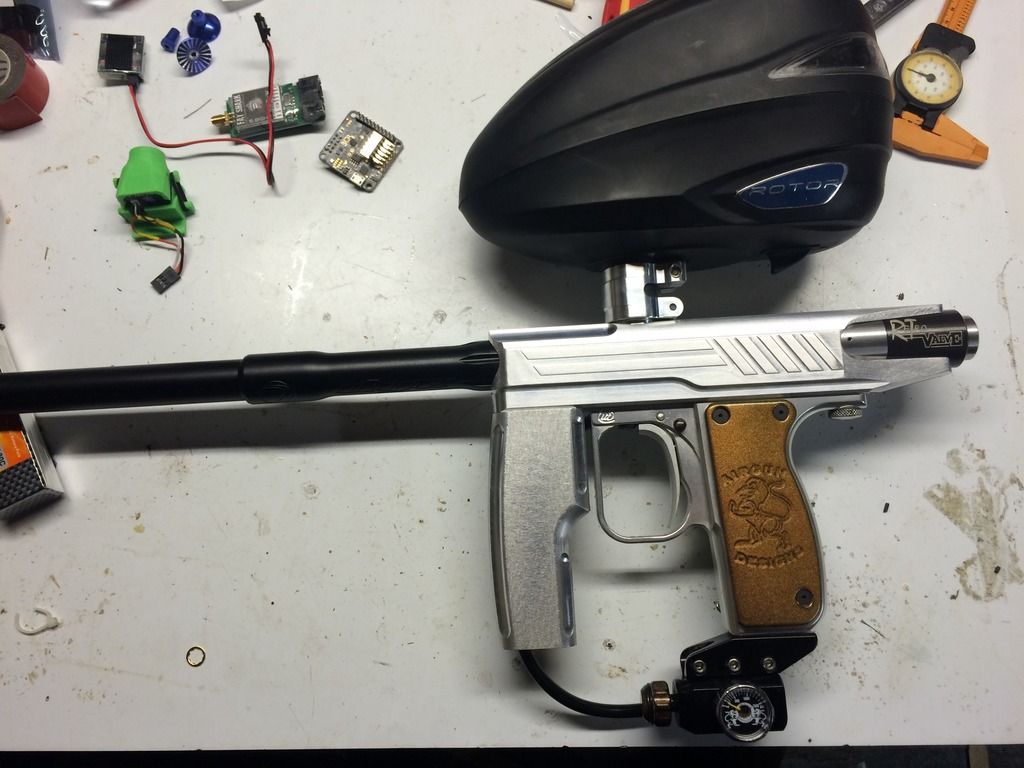
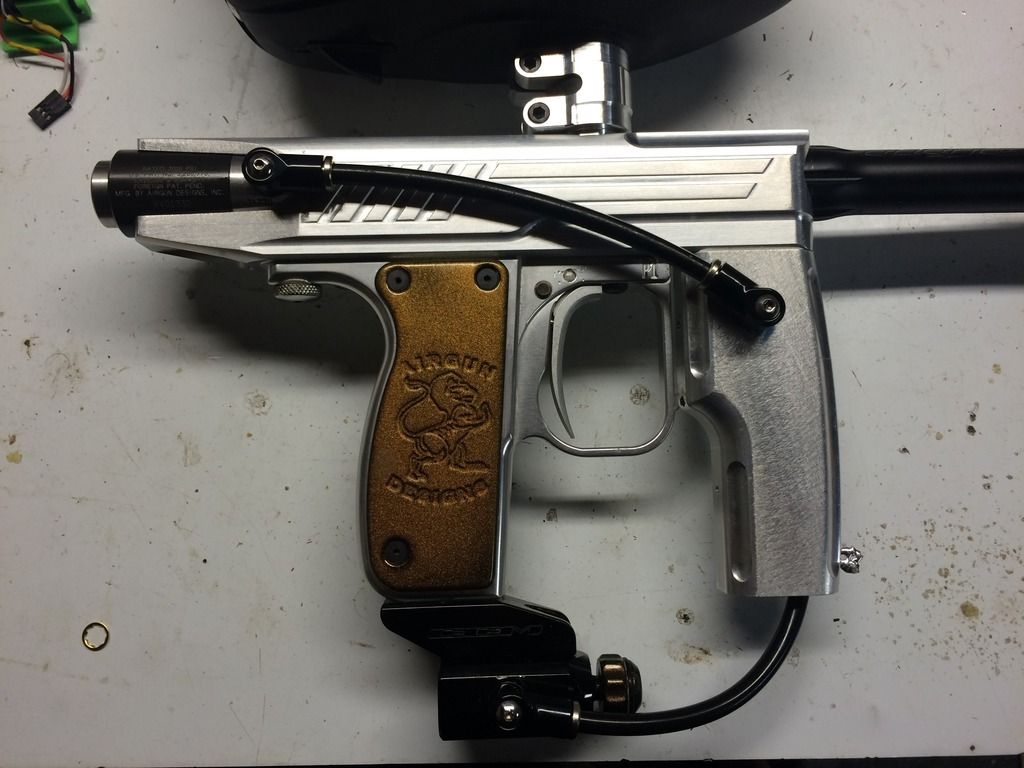
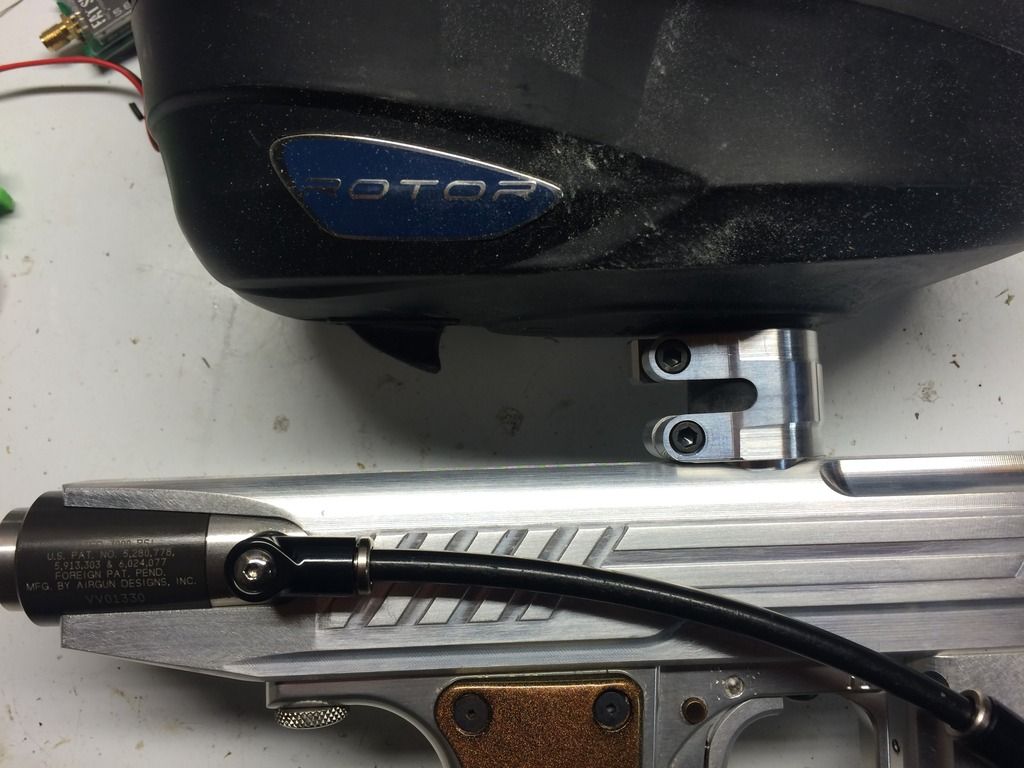
    So I slapped P1 together when I got home from work. For those interested a CCM fitting fit perfectly, I don't know if Luke changed anything or if the production bodies are the same. The feedneck fits a Rotor perfectly as well.


  25. #445
    Join Date
    Jul 2002
    Location
    Western Mass
    Posts
    582
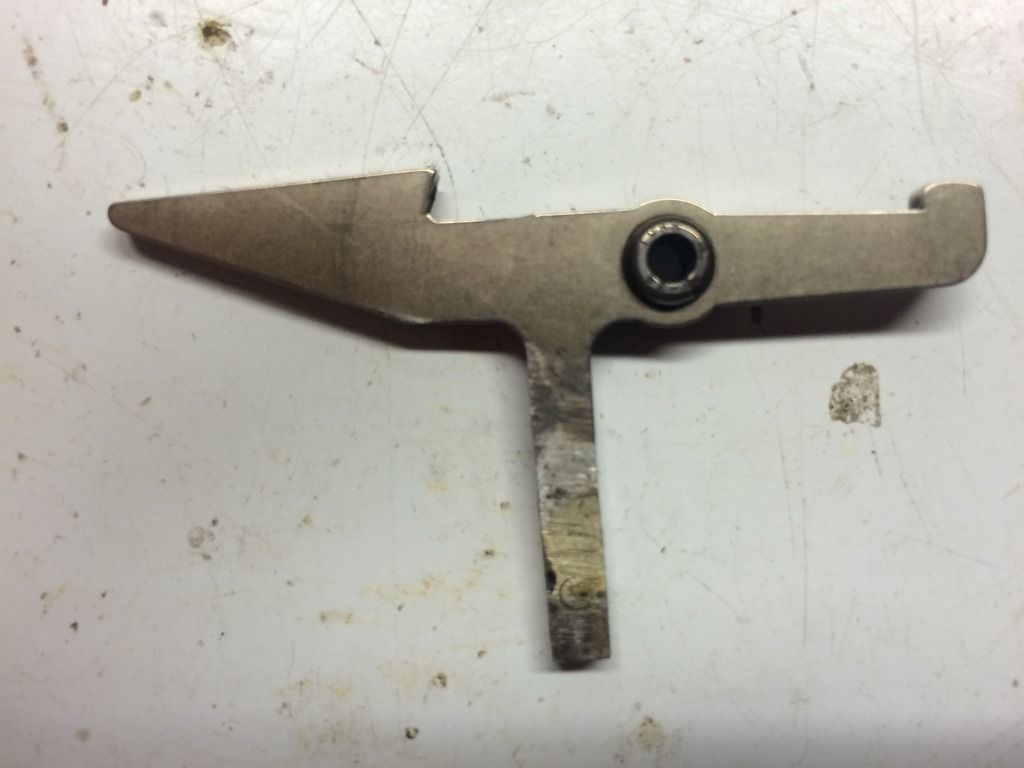
    I did run into 1 issue while putting it together that will have to wait until morning. My sear arm hits the screw that holds the OLTR on the frame. I never tried the sear with the frame before so it may be an oddball sear, the arm doesn't have any holes when the trigger pin would've been attached. I'm going to cut down the leg slightly to give me the clearance I need, probably about 1/16 to 1/8 of an inch.

  26. #446
    Join Date
    Jan 2001
    Location
    Cottonwood, Az.
    Posts
    8,184
    If you can, post a picture of the sear before you modify it. The sear sits in the same spot it would on any other body/rail combination.

  27. #447
    Join Date
    Jul 2002
    Location
    Western Mass
    Posts
    582
    I'll take a picture and measurement before I cut it. I honestly don't know where or when I got this sear, it's been in my tool bag for a long time.

  28. #448
    Join Date
    Jan 2001
    Location
    Cottonwood, Az.
    Posts
    8,184
    Quote Originally Posted by BLachance75 View Post
    If you want to make all the finishes look the same on your raw parts, specifically the LPR you can rub it down with steel wool, it only takes a few seconds.

    Also if you're interested in stripping the powdercoating off your grip panels you can pick up Permatex gasket remover from your local auto parts store.


    This stuff takes awhile to work (8-12 hours) but it will lift the powdercoating. Just put your parts in a container and apply a liberal amount of Permatex to both sides, enough so it doesn't dry out, if it does just add more. After 8-12 hours clean up the part, if there is any powdercoating remaining, soak again.

  29. #449
    Join Date
    Jul 2002
    Location
    Western Mass
    Posts
    582
    Thanks, I'm going to give that a try.

    Here is a picture of the sear. The arm is about 1 1/8" inches long from the pivot hole. I cut it down to about 1" and it fits fine.


    I got it all back together and dry fired it and everything is working great.

  30. #450
    Join Date
    Jan 2001
    Location
    Cottonwood, Az.
    Posts
    8,184
    Exactly what I suspected. It looks like someone lengthened the sear leg, probably for a Pneu-mag build.

Posting Permissions

  • You may not post new threads
  • You may not post replies
  • You may not post attachments
  • You may not edit your posts
  •