Results 1 to 24 of 24

Thread: Getting a barrel unstuck

  1. #1

    Getting a barrel unstuck

    OK so I searched and mine is a little different..... I got a rental mag from Bacci... mostly because I want to switch gears and make a double barrel pnuemag rifle. The whole thing was crammed full of sand (love 90ish cali rentals) I mean from insided the vertical adapter to the on off pin was stuck because of sand.

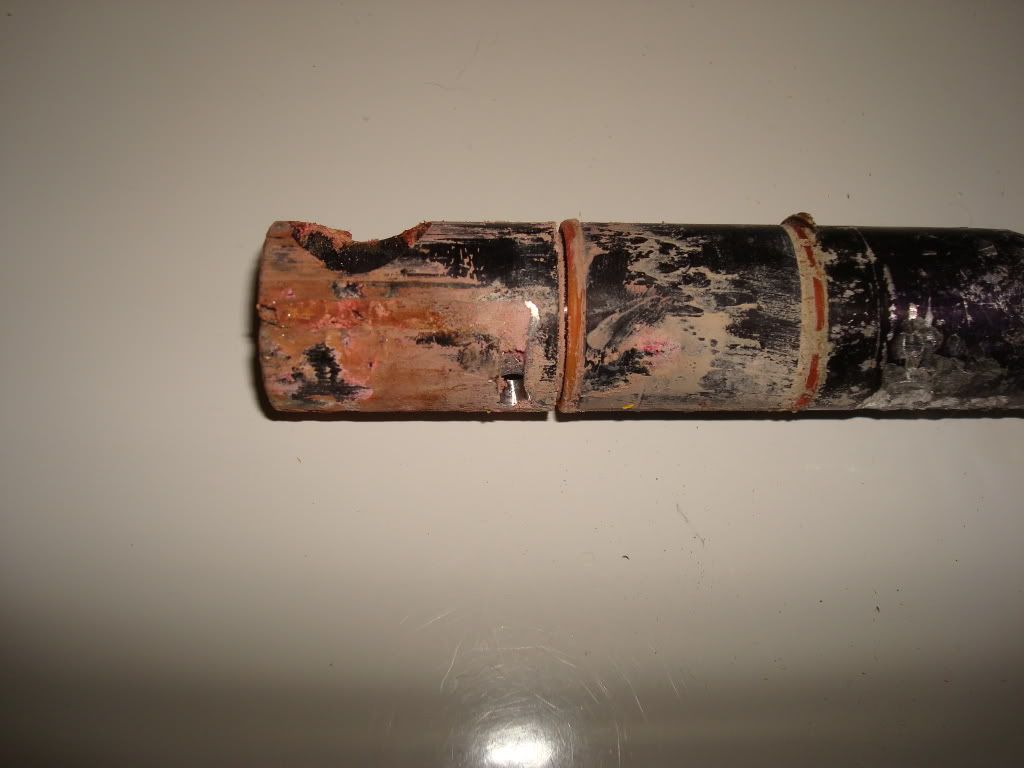
    I got most of that cleaned up but I can't get the stock barrel out.... I saw the red flakes of doom in the barrel groves that make me think the barrel was loctited in place.... the vertical adapter was also loctited... I pulled the gun apart so it is just the barrel in the body... I put it in a vice and tried pulling... I heated it for an hour in boiling water Now I am trying to freeze it then drop it in some boiling water.... I also sprayed the crap out of it with penetrating oil earlier today. Anything else I can do?
    Girls are no substatute of paintball

    Murphy's law of paintball: If it jams force it. If it breaks it needed replacing anyways

  2. #2
    Join Date
    Jun 2009
    Location
    Kentucky
    Posts
    4,144
    Get a brass or wood dowel and start beating it from the back to the front.

  3. #3
    Did you remove the twist lock pin? Sometimes they get tight,

    Shives

  4. #4
    Join Date
    Jun 2009
    Location
    Kentucky
    Posts
    4,144
    Quote Originally Posted by shives007
    Did you remove the twist lock pin? Sometimes they get tight,

    Shives
    ...

    Quote Originally Posted by M98Punk
    I pulled the gun apart so it is just the barrel in the body..

  5. #5
    Got it off... freezed it, boiled it, drilled it, chopped it, hammered it finally got it off.... then I had to drill out the hole holding the vertical adapter on... I post up some pictures of what it looks like now in a bit

  6. #6
    Ohhh broke my wooden dowel and mushroomed my brass so it almost didn't come out.... it was a red mess of sand and loctite

  7. #7
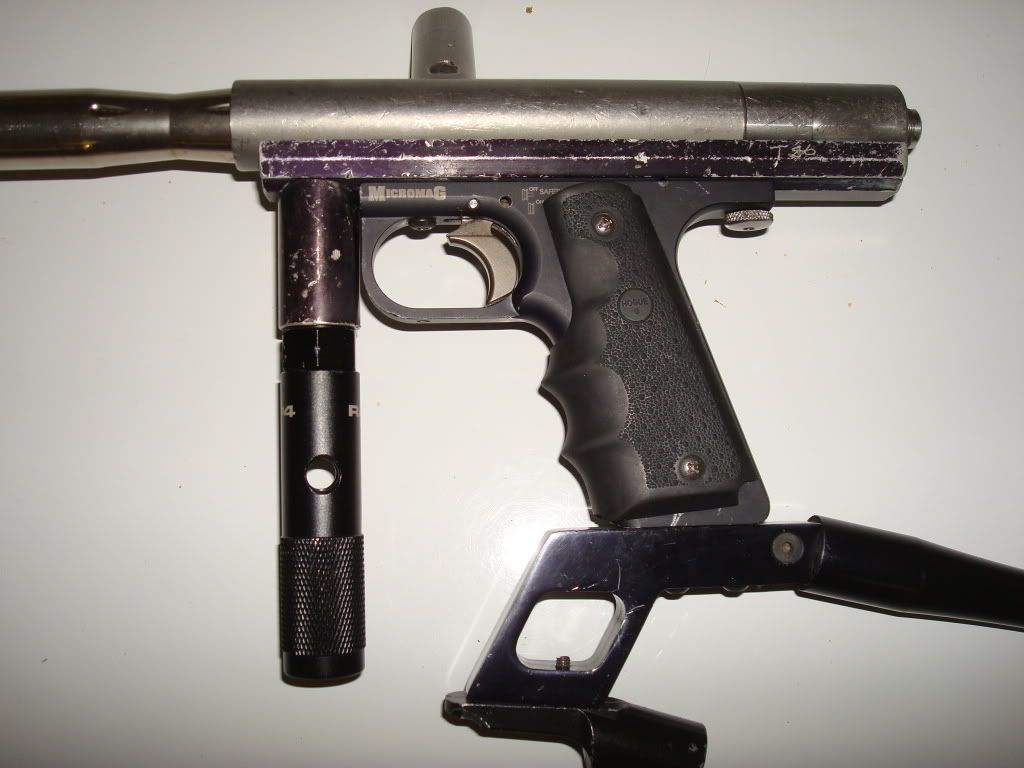
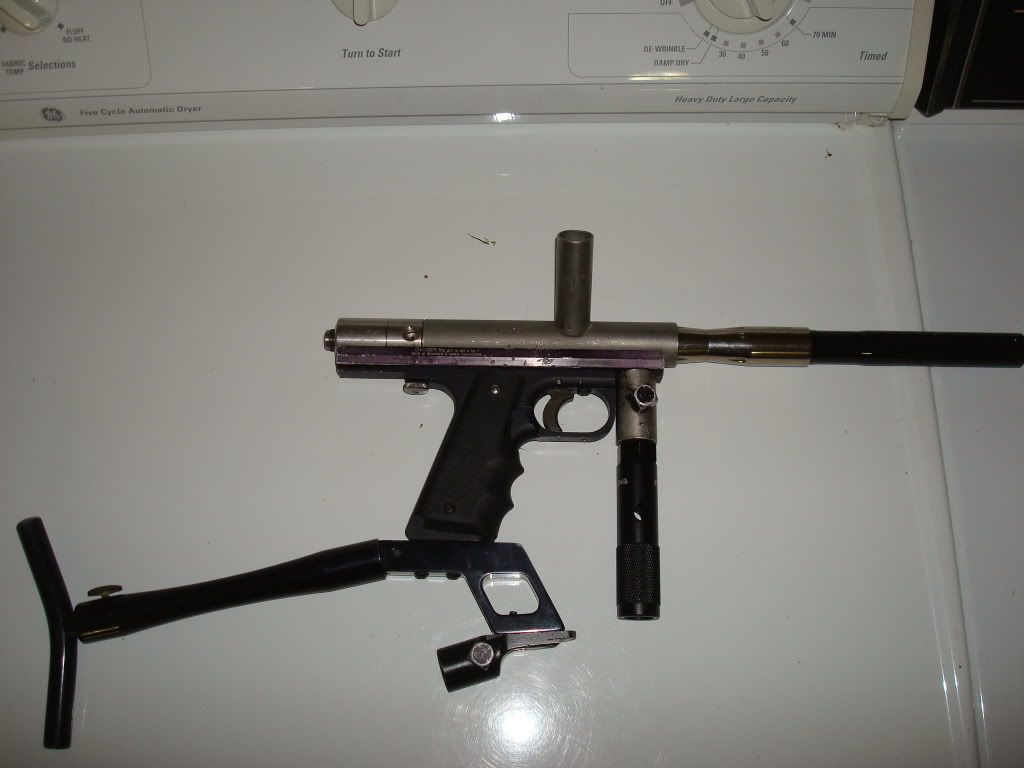
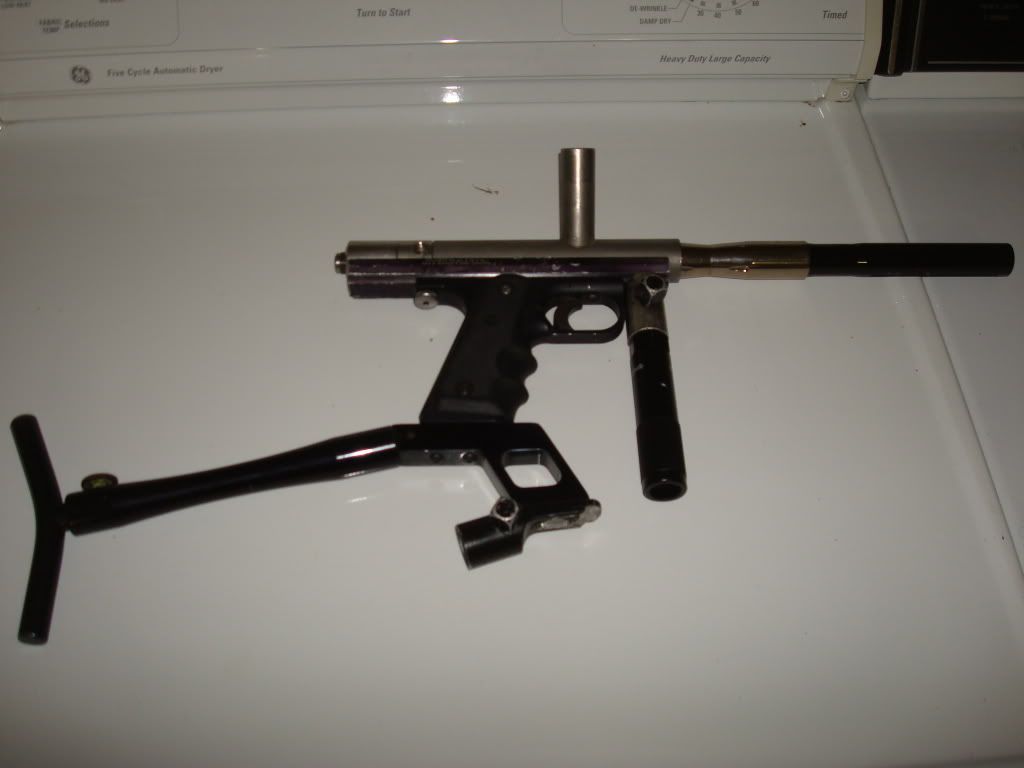
    Longer on pictures do to me having to shorten a few screws to get her to fit back together.... you crazy rail people idk how you do it

  8. #8
    Join Date
    Oct 2006
    Location
    Houston, TX
    Posts
    3,555
    For future reference, the red loctite instructions say heat to 500F. I had the chance to talk to some actual "Loctite" reps, and they suggested 450F for 5 minutes. So properly assembled red loctite should withstand boiling water. I have run some through anodizing and a steam bath without it coming loose.

    I'm sure a rental could use the boiling anyway.

  9. #9
    I always thought the heat and cool was mroe about metal expansion to separate the locktite.... either way who locktites a twist lock barrel!?! Well as soon as I clean it up my Doc's adapter is going in and he will be a happy fellow

  10. #10
    http://www.baccipaintball.com/t645.html#

    That is the before set of pictures and here is some after...

    Added a Benchmark single trigger frame, Doc Nickel cocker barrel adapter, level x, adjustable P-Stock, and a empty Rap5 bucket that I bought for the pin that is now in my drop out..... Eventually I am going to cut down the feed neck, put some Pneumatics into it and get it powder coated


  11. #11
    Join Date
    Jun 2009
    Location
    Kentucky
    Posts
    4,144
    ROFL!!!

    That's freaking awesome!!!

    I'm willing to bet since all the red stuff is by the breach hole. It's dried up 15 yr old paint and with all the sand packed in there, good indication that the marker probably never got cleaned in it's life span. How did the bolt and spring look?

    Huge kudos to you in taking on a project like that.

    That thing is a disaster. This is hands down the worst Mag I've ever seen.
    Last edited by Ando; 06-19-2012 at 11:26 PM.

  12. #12
    The pictures don't give it credit... there was some dried paint in that beast but you could see they put a nice red line of loctite on the unused twist lock channel.

    Best part is for s and g I put some air to the valve when it showed up.... held air!!! turned into a pissing machine when I pulled the trigger but that was because it had sand PACKED INTO THE TOP OF THE ON OFF!!!!

    The bolt and spring was a mess of rust and sand... as was every inch of the valve... never seen anything like it. I stripped off all the o-rings everywhere (the one on the reg piston? Had mummified and was actually more sand then o-ring) and dropped it into a nice mix of penetrating oil then a soap and water bath. lots of blue and green scrubbies later and most everything is polished up... I need to replace some more o-rings first but she should be ready to go... Oh I also took the grinding wheel to some of the worst digs I have ever seen on a mag body I really think (and this is my remembering of 90's recball) that someone lost the rear screw, slide into the sand the gun came apart. The couldn't get it to work so they took the tank off (and got that pin valve packed with sand) then put the tank back on and tried to air it up. Finally used the mag as a baton of death for a hand to hand elimination.... Only thing I can think of that would cause this

  13. #13
    I think I'm going to have to get the valve engraved with T-86 the Widowmaker....which would be fitting since eventually this will become part of my double barrel pnuemag

  14. #14
    I can just drop an R/T on/off into a classic valve? Do I need to add the bigger top o-ring that classic on/offs have or will it work with just the little one that the RT on/off comes with?? I think with my SHP tank this will turn into a mean little backup

  15. #15
    She works (almost) have to tune the lvl x some more or perhaps it was just the RT onoff? Either way I gassed her up leaked down the barrel and wouldn't cycle more then a hiccup

  16. #16
    Join Date
    Jun 2009
    Location
    Kentucky
    Posts
    4,144
    A rt on/off will work. As for the oring, get regular rt on/off oring for it. Don't use the classic ones.

  17. #17
    Gotcha... I'm pretty excited she'll be a nice little story to tell and with a SHP and the RT should have a nice trigger pull

  18. #18
    For the RT on/off to work, you either need a .750 pin or tweak the trigger rod.

    I've used RT on/off's in every Classic valve I've ever owned. I've never had an issue.

  19. #19
    Tweek the trigger rod how? I'm more of a drop a get a x-valve and ult kinda guy so messing with a classic valve is new mojo

  20. #20
    Grab pliers, twist rod. You'll just have to increase or decrease its length, all things depending.

  21. #21
    Oh LOL I was thinking it would be more then that

  22. #22
    Anybody have any thoughts on colors? At first I was thinking anno and powdercoat of some awesomely gaudy 90's colors but now I was leaning more towards a darker duracoat type of coating maybe a faux blued look or many digicamo, perhaps flat black since eventually the rail and body will be on a rifle

  23. #23
    Join Date
    Jan 2002
    Location
    Halifax, N.S., Canada
    Posts
    8,039
    Quote Originally Posted by magfan
    For the RT on/off to work, you either need a .750 pin or tweak the trigger rod.

    I've used RT on/off's in every Classic valve I've ever owned. I've never had an issue.
    The length of the on-off pin does not affect anything to do with the trigger rod. The length of the pin affects the rotational distance between when the on-off closes and the sear releases the bolt. The trigger rod has to be adjusted so that the sear can rotate far enough forward to allow the on-off to open and to push the sear far enough to allow it to release the bolt. Adjust the trigger rod so that it almost touches the back of the trigger when you hold the trigger against the safety. That gives you maximum rotational range without any restrictions.
    Except for the Automag in front, its usually the man behind the equipment that counts.

  24. #24
    Wow!! Back from the grave! Still have this project it’s next in line to get restored after my 98 STO.

Posting Permissions

  • You may not post new threads
  • You may not post replies
  • You may not post attachments
  • You may not edit your posts
  •